Deploying Office add-in / plug-in with ClickOnce
C#, C++, VB.NET
|
Add-in Express™ Add-in Express Home > Add-in Express for Office and .NET > Online Guide > Deploying Office add-ins > Add-in Express ClickOnce solutions ClickOnce deployment for Add-in Express solutionsAdd-in Express adds the Publish Add-in Express Project item to the Build menu in Visual Studio. When you choose this item, Add-in Express shows the Publish dialog that generates the deployment manifest and places it into the Publish subfolder of the solution folder. In addition, the dialog generates the application manifest and places it to the Publish / <AssemblyVersion> folder. Then the dialog copies the add-in files and dependencies (as well as the Add-in Express loader and its manifest) to the same folder. One more file copied to the Publish / <assemblyversion></assemblyversion>folder is called the Add-in Express Launcher for ClickOnce Applications or the launcher. Its file name is adxlauncher.exe. This file is the heart of the Add-in Express ClickOnce Solution. The launcher is a true ClickOnce application. It will be installed on the user's PC and listed in the Start menu and Add / Remove Programs. The launcher registers and unregisters your add-in, and it provides a form that allows the user to register, unregister, and update your add-in. It also allows the user to switch between two latest versions of your add-in. Overall, the launcher takes upon itself the task of communicating with the ClickOnce API. 1. The launcher (adxlauncher.exe) is located in the Redistributables folder of Add-in Express setup folder.
You can check its properties (name, version, etc) in Windows Explorer. Subsequent Add-in Express releases will replace this
file with its newer versions. And this may require you to copy a new launcher version to your Publish / <AssemblyVersion> folder.
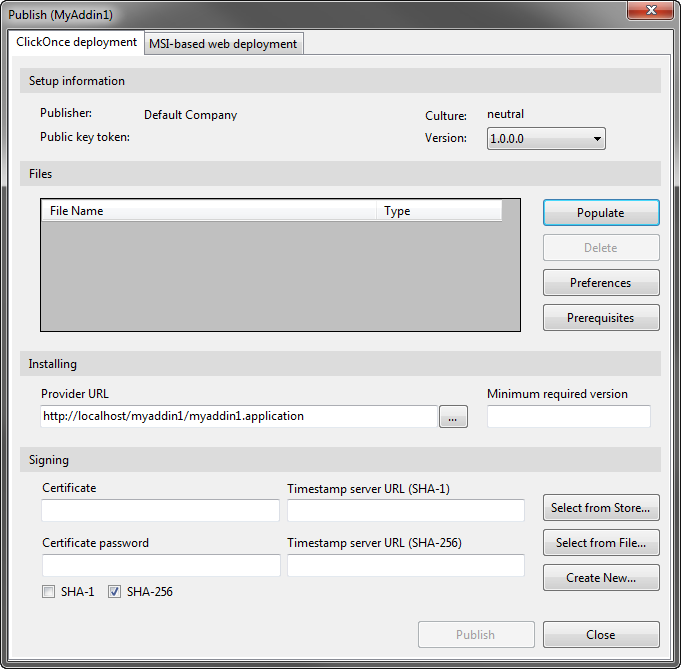
All this will be done when you publish the add-in. Finally, click on the Publish Add-in Express Project menu item to see the Publish dialog. On the development PC: publishing the add-inPublish dialog helps you create application and deployment manifests. In the current Add-in Express version, it shows the following form with the "ClickOnce Deployment" tab:
Step 1. Populating the application manifestClick Populate. This is the moment when all the above-mentioned folders are created and files are copied.
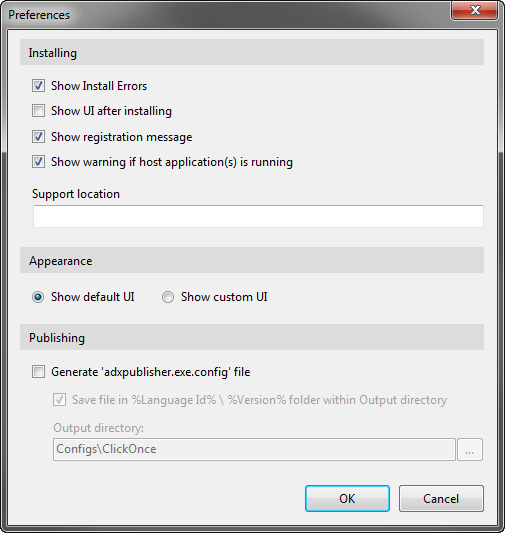
To set a custom icon for the launcher application, you add a .ico file to the list and mark the file as Icon File in the Type column of the Files listbox. How do I add additional files to the application manifest?The current release doesn't provide the user interface for adding additional files and/or folders. However, you can copy the files and/or folders required by your add-in to the Publish / <AssemblyVersion> folder and click the Populate button again. Step 2. Specifying the deployment / update locationYou fill the Provider URL textbox with the target URL of your deployment manifest (originally, it is located in the Publish folder). For Web-site based deployment, the format of the URL string is as follows: http://<WebSitePath>/<deployment manifest name>.application Note. <deployment manifest name> must be entered in lower case. You can copy it from the Deployment manifest textbox in the Publish dialog window. When debugging, you can create a Virtual Directory on your IIS server and bind it to the folder where your deployment manifest is located (the Publish folder is the easiest choice). In this case, the Provider URL could resemble this string: http://localhost/clickoncetest/myclickonceaddin1.application When releasing a real add-in, the Provider URL must specify the location of the next update for the current add-in version. You can upload version 1.0 of your add-in to any web or LAN location and specify the update location for this version. In subsequent add-in versions, you can use the same or any other update location. For instance, you can use the same Provider URL in order to look for versions 1.0, 1.1, and 1.2 in one location and, when publishing version 1.3, specify another update location. Please note, that when the user updates the current version, he or she will get the most fresh add-in version existing in the location. That is, it is possible that the user updates from version 1.0 to version 1.3. The opposite is possible , too: this scenario requires the developer to publish v.1.3 and then re-publish v.1.0. Step 3. Signing the manifestsBrowse for the existing certificate file or click New to create a new one. Enter the password of the certificate (optional). Step 4. Specifying preferences for a ClickOnce installationClick the Preferences button to open the following dialog window:
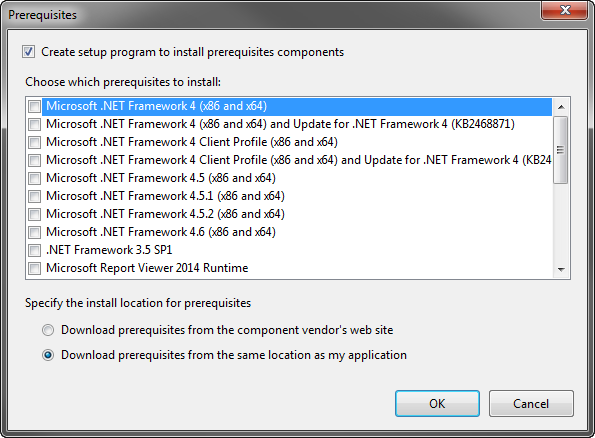
In this dialog, you can choose if the ClickOnce module will get the OnShowCustomUI event, (it allows the add-in to show the custom or built-in UI), and specify the Support Location option for Add Remove Programs. The settings specified in the Preferences dialog can be used to publish the add-in from the command line; see Publishing from the Command Prompt. Step 5. Choosing prerequisitesWhen you click this button and select any prerequisites in the dialog, Add-in Express gathers the prerequisites you've chosen and creates a setup.exe to install them. Then you can upload the files to any appropriate location. When the user starts the setup.exe, it installs the prerequisites and invokes the ClickOnce API to install your add-in. Naturally, it may happen that some prerequisites can be installed by an administrator only. In this case, you may want to create a separate setup project that installs the prerequisites only and supply it to the administrator.
Step 6. Publishing your Office add-inWhen you click the Publish button, Add-in Express generates (updates) the manifests. Manifest file names and locationsDeployment manifest - <SolutionFolder>/Publish/<projectname>.application
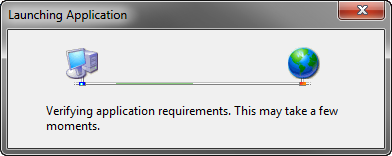
Now you are able to copy files and folders of the Publish folder to the deployment location, say a web server. Please note, for testing purposes, you can just double-click the deployment manifest. Step 7. Publishing a new version of the add-inIn AssemblyInfo, change the version number and build the project. Click Publish and add the add-in files (Populate button). Fill in all the other fields. You can use the Version check box to switch to the data associated with any previous version. See also Publishing from the Command Prompt. On the target PC: Installing, updating, uninstalling the add-inInstalling: user perspectiveThe user browses the deployment manifest (<projectname>.application) in either Internet Explorer or Windows Explorer and runs the installation. The following window is shown:
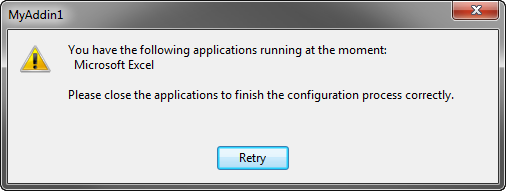
In accordance with the manifests, the ClickOnce loader will download the files to the ClickOnce application cache and run the launcher application. When run in this mode, it registers the add-in. If the host applications of the add-in are running at this moment, the user will be prompted to close them.
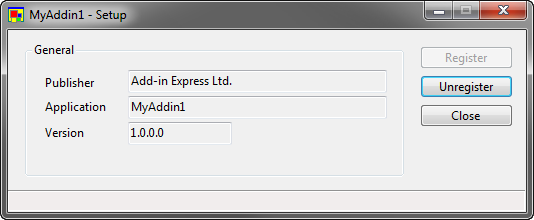
If the user clicks Cancel, the launcher will be installed, but the COM add-in will not be registered. However, in any appropriate moment, the user can click the launcher entry in the Start menu to run the launcher and register/unregister the Office add-in through the launcher GUI.
The current Add-in Express version relies on the name and location of the product entry in the Start Menu. Please, add this information to your user's guide. Installing: developer perspectiveIf a ClickOnce module (ADXClickOnceModule) is added to your add-in project, you are able to handle all the actions applicable to add-ins: install, uninstall, register, unregister, update to a newer version, and revert to the previous version. For instance, you can easily imagine a form or wizard allowing the user to tune up the settings of your add-in. The ClickOnce module also allows you to show a custom GUI whenever the launcher application is required to show its GUI. Please note that if you don't process the corresponding event, the standard GUI of the Add-in Express ClickOnce application will be shown. You can also make use of the ComRegisterFunction and ComUnRegisterFunction attributes in any assembly listed in the loader manifest (see assemblyIdentity tags). The methods marked with the ComRegisterFunction attribute will run when the add-in is registered. See MSDN for the description of the attributes. Updating the add-in: user perspectiveThe user can check for add-in updates in the launcher GUI (or in the GUI you supply). To run it, the user clicks the entry in the Start Menu. If there is no update in the update location specified in the deployment manifest, an information message box is shown. If there is an update, the launcher requests the user to confirm his/her choice. If the answer is positive, the ClickOnce Loader downloads new and updated files to the ClickOnce application cache, the launcher unregisters the current add-in version, restarts itself (this will run the launcher application supplied in the update files), and registers the add-in. Updating the add-in: developer perspectiveThe add-in module provides you with the CheckForUpdates method. This method may have the following results:
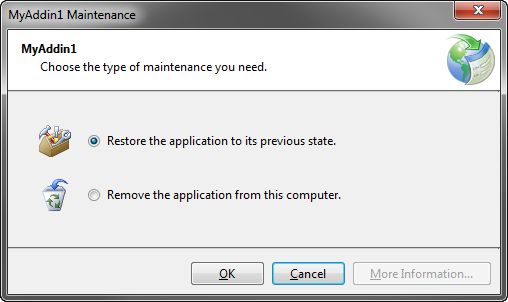
Uninstalling: user perspectiveTo uninstall the add-in, go to Add Remove Programs and clicks on the product name entry. This will open the following dialog:
This option is disabled, if the add-in was never updated. If the user chooses this option, the launcher will run, require the user to close the host applications of your add-in, unregister the add-in, requests ClickOnce API to start the launcher application of the previous add-in version, and quits. Then the launcher application of the previous add-in version registers the add-in.
This runs the launcher that will require the user to close the host applications of your add-in. Then the launcher will unregister the add-in and request ClickOnce API to delete both the add-in and the launcher files. Uninstalling: developer perspectiveHandle the corresponding event of the ClickOnce module or use the ComUnRegisterFunction attribute to run your actions when the add-in is unregistered. Note. In the Web-based deployment scenario, the user can install an Office extension using Internet Explorer only. The ClickOnce article from Wikipedia states that Firefox allows ClickOnce-based installations too, but this was neither tested nor even verified. Customizing ClickOnce installationsYou can add a ClickOnce module to your add-in project and handle the ADXClickOnceModule.OnClickOnceAction event: ClickOnce doesn't provide any opportunity to customize or hide dialogs and messages shown while the user updates your add-in.
|
