MSI-based web deployment
for per-user and per-machine Office add-ins
|
Add-in Express™ Add-in Express Home > Add-in Express for Office and .NET > Online Guide > Deploying Office add-ins > MSI web-based deployment - ClickTwice :) MSI web-based deployment - ClickTwice :)ClickTwice is designed to help you deploy and update per-user and per-machine add-ins over the web. This technology allows using your favorite installer to create an .MSI installer. For instance, you can develop your setup project in Visual Studio, see Creating MSI installers for Office add-ins. On this page you will find information pertaining to:
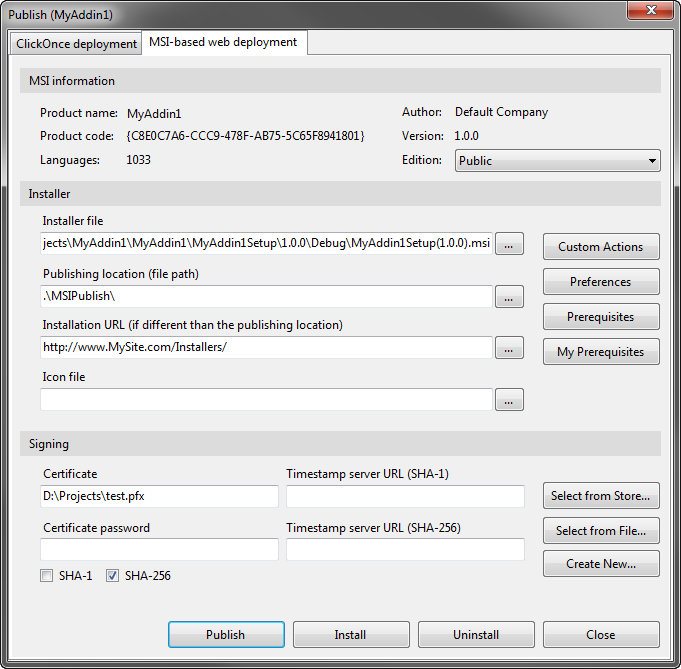
Introduction to ClickTwiceYou start with publishing the installer. Open the Publish dialog to specify the .MSI file to be published, the URL from which the add-in and updates will be installed, provide certificate info, select prerequisites and choose options. You can customize the installation process by providing a custom action DLL containing a ClickTwice module; that class provides a programmatic interface to the ClickTwice functionality. Clicking the Publish button prepares the files required for your add-in to be deployed and organizes them in several folders within the specified folder (local). There are several important files to note:
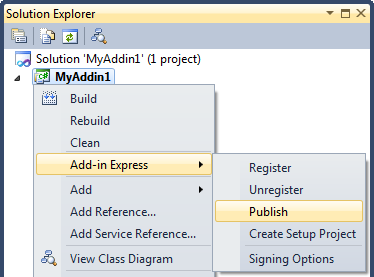
You copy the complete folder structure including the files described above and prerequisites to a location, which is accessible by the end user via the specified URL. Then you provide the user with a link pointing to the downloader. The user clicks the link, the browser downloads the downloader and starts it. If prerequisites are specified, the downloader starts setup.exe and waits for the prerequisites to be installed. This ends up with the downloader downloading the .MSI and running it. Finally, the add-in gets installed. Publishing an update modifies the XML file and puts the new bootstrapper, downloader and .MSI to separate folders in the same local folder. You copy the folder to the location accessible by end users. When your add-in invokes the CheckForMsiUpdates() method, it downloads the XML file and checks the version information. If there's a new update, it returns the URL of the downloader. You download the file and start it. Publishing the Office add-in projectBuild the add-in project and choose Publish ADX Project in the project context menu or in the Project menu. The features described below can be run from the command prompt; see Publishing from the Command Prompt.
This opens the Publish dialog discussed in the next section. Installer fileSpecifying the path to a .MSI installer in the Publish dialog fills in info fields in the upper part of the dialog.
Publishing locationYou may publish the installer to a file share or FTP server; publishing to an IIS is not supported. When publishing the installer, the Publishing location can be a file path or a path to an FTP server. By default, the Publish wizard suggests publishing your application to the MSIPublish subfolder in the project directory. In Publishing location, enter the location using one of the following formats:
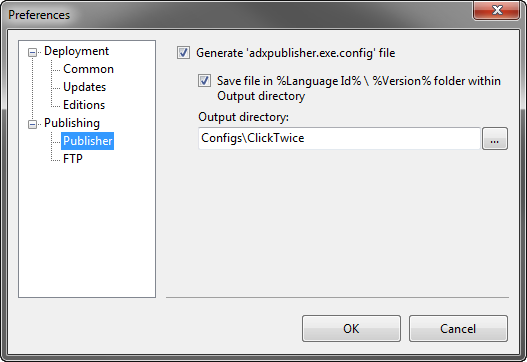
Installation URLThe location from which users download and run the installer may differ from the location where you initially published it. For example, in some organizations, a developer might publish an application to a staging server, and then an administrator can move the application to a web server. In this case, you can use the Installation URL field to specify the Web server to which users will go to download the installer. This step is necessary for Add-in Express to know where to check for updates. In Installation URL, enter the installation location using a fully qualified URL in the format http://www.domain.com/ApplicationName, or a UNC path using the format \\Server\ApplicationName. Note. If Publishing location and Installation URL are the same, Installation URL will be empty when you open the Publish wizard next time. Icon fileYou can specify an icon in the Icon file field. The icon will be shown in the downloader window, which is displayed when the installer is downloaded from the installation location. Custom ActionsYou use the Custom Actions dialog to specify a custom action .DLL(s). To create a custom action .DLL, create a class library project and add a ClickTwice module to the project; see the Add New Item dialog of the project. To customize the installation process, you handle the events provided by ClickTwice. PreferencesClick the Preferences button to open the Preferences dialog.
The dialog allows you to specify several UI-related options such as showing the Windows installer UI during installation / uninstallation. The Generate multi-language prerequisites option is only available if the installer is created using a multi-language setup project; see Multiple-Language Installers. Also, you may choose to sign the version_info.xml file with a certificate specified in the Publish dialog.
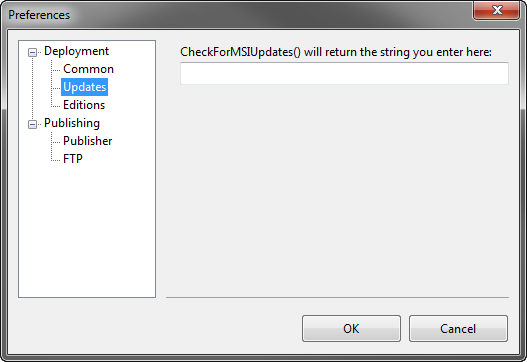
Also, it allows specifying an arbitrary string such as the URL of a web page. That string will be returned by the CheckForMSIUpdates() method, see Updating an Office Extension via ClickTwice :). This allows implementing custom update logics, welcome pages, information pages, etc.
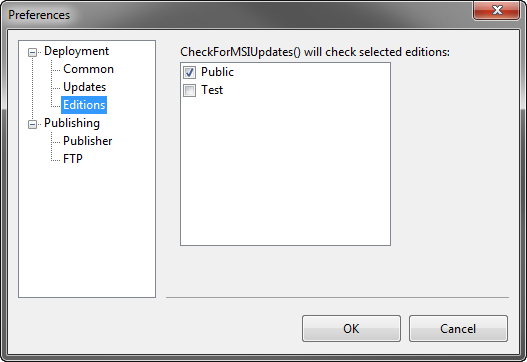
It allows specifying the editions to be checked when the plug-in invokes the CheckForMSIUpdates() method.
The settings specified in the Publish dialog can be used to publish the add-in from the command line; see Publishing from the Command Prompt.
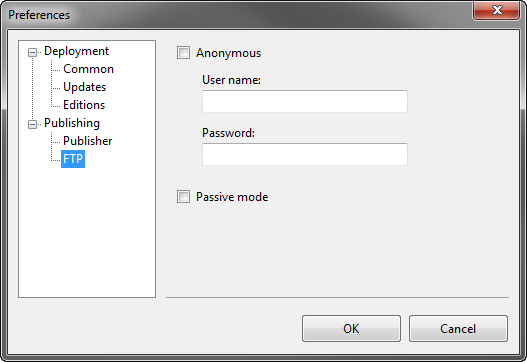
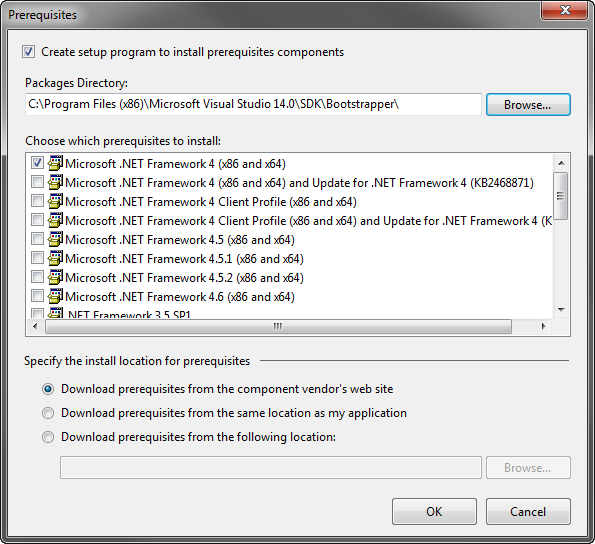
This page allows specifying FTP login parameters. PrerequisitesOpen the Prerequisites dialog and select the prerequisites required by your Office extension.
If the MSI installer was created by a multi-language setup project setup project (see Multiple-Language Installers) and if the Generate multi-language prerequisites check box is selected (see section Preferences above), choosing prerequisites in the form above creates prerequisites for the specified languages. You must choose the following prerequisites for installing on a clean PC:
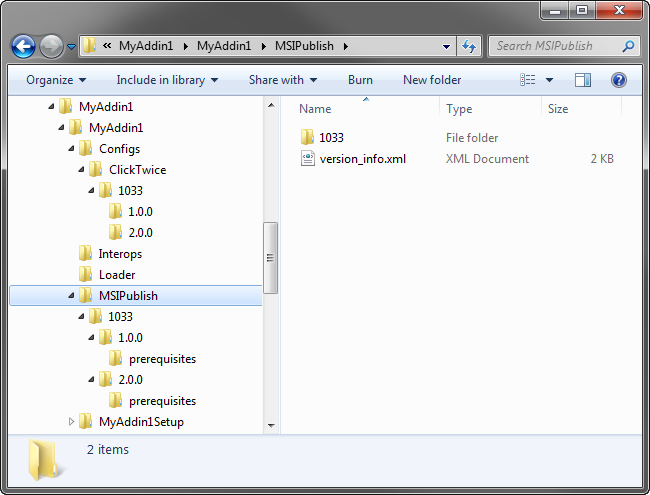
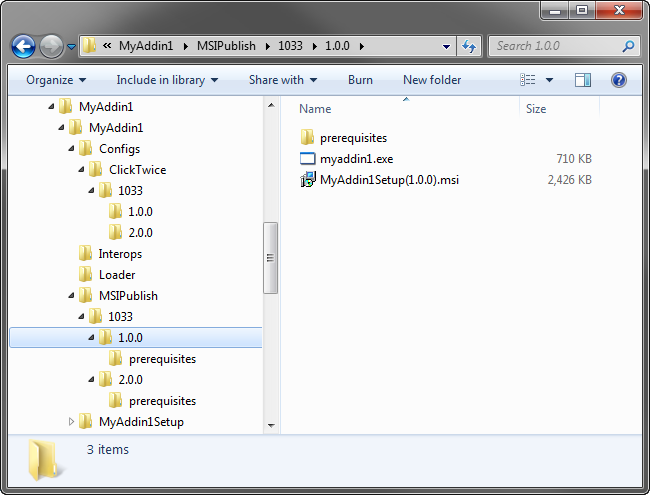
CertificateTo sign the installation files, select a certificate from the certificate store, browse for the existing certificate file or create a new certificate. Specify the URL of a time-stamp server (optional). Clicking PublishWhen everything is ready, click the Publish button. This generates files discussed below. See also Publishing from the Command Prompt. Files generated by ClickTwice :)In the process of publishing controlled by the Publish wizard, you specify the .MSI installer to be published as well as the location where subsequent updates of your Office extension will be located. The wizard generates the folder structure demonstrated in the screenshot below:
Below, we describe every folder shown in the screenshot. Folder MSIPublishThe root folder of the folder structure created by the Publish wizard is the MSIPublish folder; you can specify any other folder, of course. version-info.xml describes all updates available for the given product. A sample version-info.xml is shown below: Language-specific folders (MSIPublish\1033)Folder 1033 in the screenshot below is named according to the language code of the installer UI. A list of language codes (or Locale Ids) can be found here. Every language-specific folder contains one or more version-specific folder. Version-specific folders (MSIPublish\1033\1.0.0 & 2.0.0)These folders are named according to the version of your .MSI installer; see the Version property of the setup project in VS. You see the content of such a folder in the screenshot below:
The folder contains:
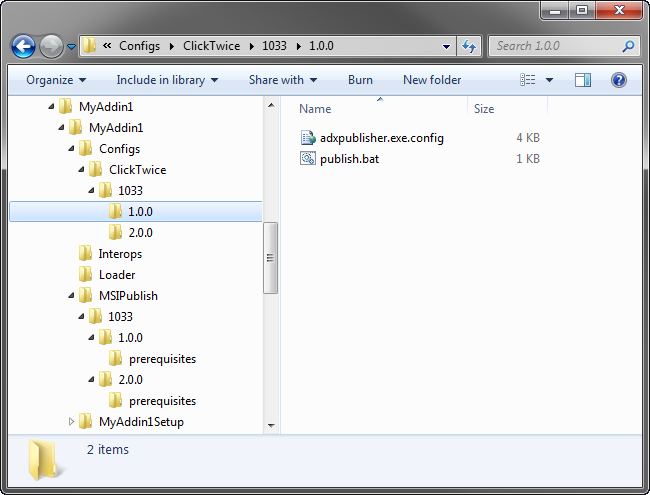
Prerequisites Folder (MSIPublish\1033\1.0.0 & 2.0.0\prerequisites)This folder is only created if you specify prerequisites. Config Folders (Configs\ClickTwice\1033\1.0.0 & 2.0.0)Such folders are only generated if the corresponding check box is selected on the Publisher page of the Preferences dialog; see section Preferences above. A config folder contains two files:
See also Publishing from the Command Prompt. Updating an Office extension via ClickTwice :)Every Add-in Express module provides the CheckForUpdates method. When your Office extension calls it, the version_info.xml is downloaded via HTTP and parsed. If there are no updates, CheckForUpdates returns an empty string. If there are new updates, CheckForUpdates finds the latest update and returns either the URL of the corresponding setup.exe (if it exists) or the downloader. Note.To implement custom update logics, welcome pages, information pages, etc., you may choose CheckForUpdates to return a URL of your choice; see Preferences. The code sample below demonstrates installing a new version of your COM add-in programmatically; the user clicks a Ribbon button to initiate the process. The code is based on four methods.
Customizing ClickTwice installationsYou can download Web Authoring Example (ClickTwice) . This is a C# project demonstrating the use of advanced ClickTwice features. If you write in VB.NET, you can use any C# to VB.NET code converter available on the web. Step-by-step samplesPlease check the following articles: |
